


")


We, the Gamerboard pen-and-paper round, have been looking for a present for a friend, fellow player and game master who has been playing with us for years. - And we found something!
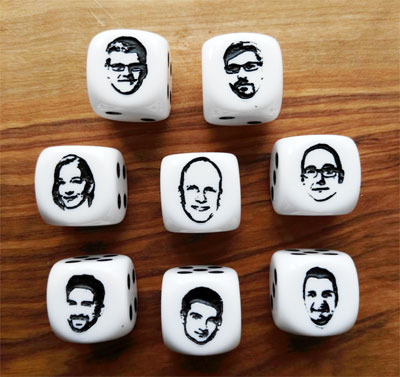
A set of dice. But not ordinary dice. - Dice with the portraits of all members of this RPG round on one page. And we put the cubes in a frame and wrote our autographs on the frame and and a plate with a dedication.
And that's how we did it:
Portraits and Dice
At first we thought that a normal imprint on a dice would get rubbed off over time. So the portrait had to be engraved. On the internet we found a company that makes cubes with individual engraving. Instead of the one or the six a motif can be engraved into the dice by laser.
The company, which offers such dice plus engraving, has also advised us well by mail. We were able to produce portrait template files for the engraving according to their specifications, using Photoshop. A dark portrait for light dice and a light portrait for dark dice.

Photoshop Quick Start Guide: Minimum size 800 x 600 px
Cut out the face – Auto Contrast - Grayscale Image – Threshold - Remove scratches – Revise image, frame it if necessary – Wand (without smoothing) - Remove white
The Photomontage
Then the engraver sent us photomontages showing how the dice could look with the portraits. We also got the information that the engraving would not be quite as detailed as the picture on the file. The reason: The laser can not burn as thin lines in the plastic cube as a laser printer can puts lines on paper.
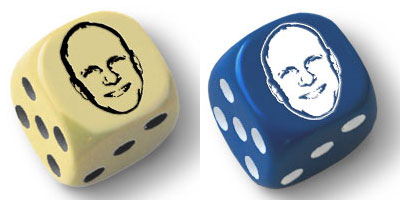
The photomontage looked quite promising. So we ordered as a first test a light and a dark cube. A few days later they arrived at our place. You can see on the photos that the portrait of the engraving is actually not quite as detailed as the original in the file or the photomontage. Nevertheless, you can recognize the face well enough.
So we ordered a couple of portrait cubes for each team member. One for the present, the others for exchanging and handing over, for example instead of business cards.
The Frame
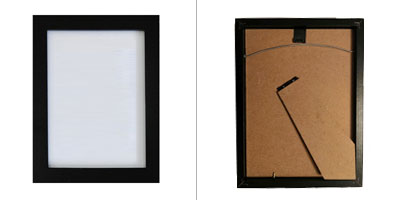
Since we did not want to simply hand over the dice in a bag, we bought a frame for our 8 dice. The important thing is that the frame is deep enough to hold the dice and still have enough room for the back plate.

The Frame Inlay
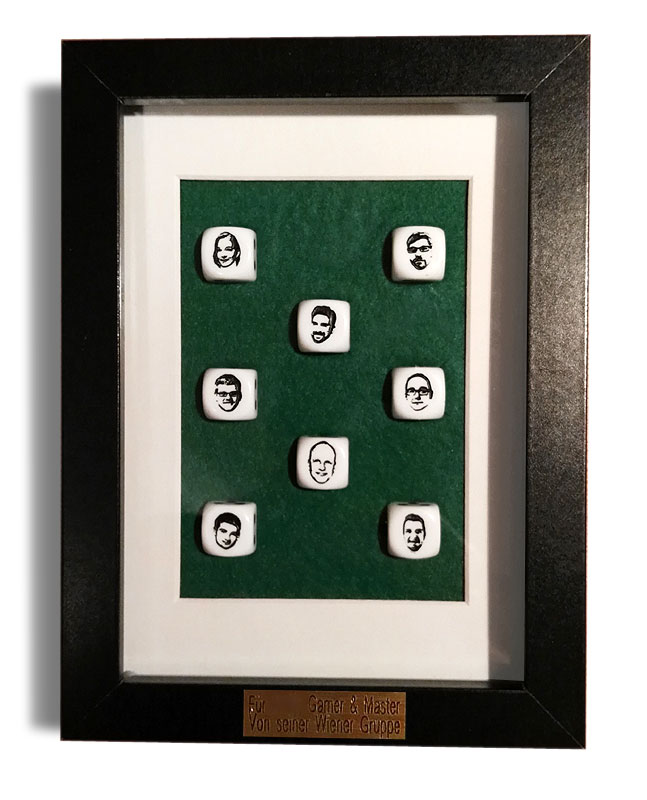
In order to keep the dice in position, we made an inlay. For this we cut a piece from an old yoga mat (styrofoam does it too), which is half as thick as the dice, covered the piece with green adhesive felt and then cut out openings for the dice.
We then glued this to the back plate of the picture frame.
Then we put our autographs on the passepartout of the frame next to the portrait cubes.
Finally we had to alter the frame a bit. The backing plate mount was designed to sit directly behind the photos and the glass, not to have dice behind it. With a few nails and a piece of wire that was done quickly. You can now easily remove the dice from the frame and use them.
The Plaque
The plaque with the dedication we ordered from a shop that sells trophies. The small tags (ours is 5 x 1.5 cm), which are attached to cups, have just the right dimension for our frame.
And this is how it looks:
We have those dice in our shop now: Portrait-Dice
 Customer-reviews: For reading and wirting Customer-reviews please see